Overview
WARNING !! Use TuneECU
ONLY for motorcycle listed on the compatibility list.
Everything else can be found on this homepage on the other pages.
TuneECU for Android is only available on the developer's official website.
- Standard: for private users (limited to 5 bikes) € 25.-
- Pro: for professionels (unlimited bikes) € 300.-
Important:
As of September 1, 2023, newly purchased licenses are no longer valid for life.
As before, all licenses purchased before September 1, 2023, remain valid for life if they
were not purchased through the Google Play Store. Licenses purchased through the
Google Play Store for €12 could be migrated for one year and then had to be renewed
for a fee.
Modification from September 1st, 2023 : - The standard license is valid for 1 year.
When the license is renewed, the number of registered bikes will be reset to zero. - The Pro license is valid for 3 years.
Important:
When purchasing the software, the user account sent to the developer (usually the Google account installed on the device) must be used, otherwise the license cannot be activated on the developer's server. Please go to https://tuneecu.fr and read the installation and registration documentation.
Technical Support only in Chat and only in english or french language.
Or at the new TuneECU forum, also in English or French only.
Support is only for the TuneECU Android- software, no advice or recommendation will be given
on the use of maps.
To get support, the following information are required:
- A short description of the problem.
- Android device & Android version
- License type (Standard or Pro)
- The exact TuneECU version, (e.g. 5.4.16)
- From where purchased and installed? (From the Google Play Store or from the developer's website?)
- What connection is used, Bluetooth or cable ?
- For Bluetooth problems: What a Bluetooth adapter is used? (Manufacturers and
Firmware version) - For cable problems: Cable manufacturer or source of supply.
- Which cable adapters are used (OTG etc.) manufacturer or source of supply.
- Loaded Map in ECU (e.g. 12345map.hex)
- Bike manufacturer, model and model year
- VIN of your bike (the last 6 characters of the chassis number, either consisting of digits or a combination of letters and digits)
- Also post the contents of the "trace.txt"
No support when it comes to such trivial questions as:
- Is my bike compatible and which functions are supported (see simply in the Bikes List)
- Which cable do I have to use and where can I get it (see simply "System requirements")
- Which Bluetooth adapter do I have to use, etc., questions that everyone can answer for themselves
if they only deal a little with the instructions and the software itself.
1.Introduction:
which are built into some motorcycle models with Electronic Fuel injection.
Compatible
models, see HERE
Important!! Also note the footnote in this list.
Suitable Custom maps for reprogramming can be found
HERE
Suitable OEM maps for reprogramming can only be used
can be downloaded using the TuneECU app.
OEM maps can be downloaded directly from the opened TuneECU app also (select the menu "map" -- "open" --"download") and saved on the Android device and edited also.
Info:
For a few years now, Triumph hasn't changed its map names on updates, only the revision level is added.
To
always use a map that has the current revision level, download the map
directly from the app via the menu: "Map---open---download" from the
server of the TuneECU developer's. You can display the revision status from the map, in the map information after the download.
1.1 System requirements:
- Smartphone
or Tablet Android version 4.4 minimum, dual Core 1.2 Ghz mini and OTG.
RAM absolute minimum 2 GB RAM, best and most stable, works TuneECU with at least
3 - 4 GB RAM.
You can test your phone or Tablet for OTG connectivity with the App "USB Host Test"
and / or the App "OTG Troubleshooter" from Google Play Store.
Note:
The cheap phones or tablets with Android Go versions do not have enough memory to run TuneECU and no OTG support for using a USB cable.
Please note that there are currently issues with devices running Android OS version 14 or later.
Whether these issues can be resolved remains to be seen.
. - Experience report on Android 12+ and the permissions for TuneECU, from user "computersmith" in our forum:
Permissions have always been declared individually in the manifest (& still are). For Android 11 & below, WiFi, Bluetooth, etc permissions were presented to the user individually, however for Android 12+ the "Nearby Devices" permission that the user sees covers all of those connection methods. Also, how permissions are declared & granted depends on the API level the app targets. Runtime Permissions functionality (ie: the user being presented with a dialog asking for a permission when it's required vs asking for all permissions when the app is installed) was introduced in Android 6. Regardless, the relevant permissions are declared in the manifest, so users can "back door enable" them via the system settings.
To prove this, I ran a test on one of my Android 14 devices that has never had TuneECU installed on it. I downloaded the latest version from tuneecu.fr & installed it. When I went into Device Settings->Apps->TuneECU the Nearby Devices permission was already set - which makes sense because it's not classed as a "Dangerous Permission" by Android, but on some devices the customised version of Android may automatically disable it as an extra security measure. Anyway, for the purposes of the test I disabled the Nearby Devices permission & then tried to connect to my OBDLink LX Bluetooth device, but TuneECU couldn't see any devices at all. Then I went back & re-enabled the Nearby Devices permission & TuneECU was able to scan for & connect to my OBDLink LX. I tried to attach screenshots & also provide shared links to them from my Google Photos account, but the forum wouldn't play the game...
This could be the solution to many problems installing and using TuneECU on current Android devices. Please try it out.
. - Cable
USB OBD2 KKL FTDI (The cable is the same as the windows version)
Info: FTDI chips which have been proven to work if the cable is of good quality: - Chip type: FT232R, Vendor ID: 0x0403, Product ID: 0x6001
- Chip type: FT232 / 245BM, Vendor ID: 0x0403, Product ID: 0x6001
- And from TuneBoy the USB cable with Chip Type: FT232R, Vendor ID: 0x0403, Product ID: 0xBF40
- FTDI chips with Vendor ID 1027 also fit.
- Adapter
USB/micro (cable OTG) if needed.
- Optional:
Interface Bluetooth, but only those recommended by the developer..
Attention:
For the Triumph models, which can be reprogrammed via Bluetooth only, special Bluetooth-adapters like the "OBDLink LX" or the "OBDLink MX" or MX+ or "UniCarScan UCSI-2100" have to be used, only these adapters allow the reprogramming. (see Bike List).
. - For
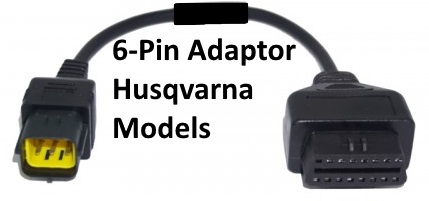
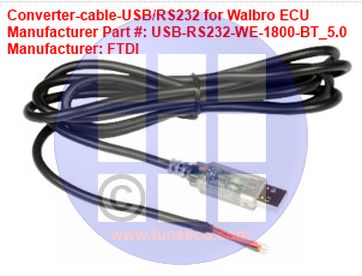
the Walbro Benelli models, a special converter cable and AMP Super-Seal
connector (6 pin)
is still required, see here.
Ducati, Moto Guzzi, Gilera & Moto Morini ECUs, other components are required in addition to
the OBD-2 cable and the OTG adapter, components checked with TuneECU are available from Lonelec.
WARNING: Avoid the cheap adapters on online platforms, there's a lot of bad chinese clones
that don't work or not properly with TuneECU and specific protocols use by bikes supported.
Some bluetooth adapters recommended, see the list below:
Devices tested:
This is not an exhaustive list. Please note that there are currently issues with devices running Android OS version 14 or later. Whether these issues can be resolved remains to be seen. |
Adapters Bluetooth tested
The following Bluetooth adapters are required for models that can be remapped via Bluetooth, see Basics. Other adapters are not suitable for remapping. If problems occur with one of the OBDLink Bluetooth adapters, it can be reset to the FACTORY SETTINGS. 1.Press and hold the connect button for 15 seconds. 2.When factory defaults are restored, the green Power LED will blink and then turn solid.
Both the above and the following adapters are suitable for diagnosis & maintenance. See Bikes List.
BAFX have posted warnings on their website about copies of their products.
This is not an
exhaustive list. |
Note: We can not know all the devices on the market or future devices.
We can make a reliable statement only about the devices, that we have tested ourselves.
Of course, since we are private people, we can not constantly buy and test devices from all manufacturers.
References to other Android devices and Bluetooth adapter, which work with the Android version
of TuneECU, are gladly accepted in the TuneECU-forum.
1.2 Installation Guide of TuneECU for Android:
HERE as a PDF file for download.
1.2.1 Registration Guide:
HERE as PDF File for download
1.3 Utilization / ECU Connection:
To switch between screens, swipe the screen from left to right or vice versa.
In “Map” mode, with a map open, the different tables can be displayed by swiping the screen up or down.
From the “F” or “I” screen, the corresponding corrections F Trim table can be displayed by swiping towards
the right.
Connection to ECU (Sagem & Keihin models) with cable:
- Connect the cable OBD (with OTG adapter if needed) to your Android device and to the diagnostic connector on your bike.
- Open TuneECU and authorize the app to access the USB
accessory.
- In the ECU-menu, use the option "Select" to set the ECU type (for example, Triumph Keihin)
- Turn on the ignition
- In the “ECU” menu, select “Connect”. The light in the
bottom right corner starts blinking:
- Red – Initiating Connection to the ECU
- Orange – authentication
- Green – Connection established
Connection with compatible Bluetooth adapter:
paired with your android device (headphone, speaker...).
- Start the Bluetooth function in your Android device
- Plug the compatible Bluetooth adapter into the diagnostic connector on the bike
- Turn on the ignition
- Connect the Bluetooth adapter and the Android device via the pairing function
- Start TuneECU
- When
you start TuneECU for the first time, select the Bluetooth adapter to
use.
If you start it later, all you have to do is confirm that the application is authorized
to enable Bluetooth. - In the ECU menu, use the "Select" option to select the ECU type (for example, Triumph Keihin)
- Select "Connect" in the "ECU" menu
When using a compatible Bluetooth adapter, the LED flashes:
- Blue while connecting,
- Red – Initiating Connection to the ECU
- Orange – authentication
- Green – Connection established
Note: For the Walbro models is when using TuneECU for Android, still a
converter cable, FTDI-USB-RS232, required.
- Connect the cables with the Android device and the 6-pin diagnostic socket of the bike.
- Do not connect the 2-pin connector.
- Start now TuneECU.
- In
the Menu "ECU", use the option "Select" to set the ECU type.
Note: For Benelli 899/1130 models (Walbro ECU): The selection for these models
will only be displayed if you have connected the cables to the Android device.
For these models, keep also the 2-pin connector ready and connect it to the ECU only
when prompted by TuneECU.
- Turn on the ignition
- Now select the menu "ECU" <Connect>
Means that this information does not have to be applicable to all model years.
The app has four main screens:
- Map
- Dashboard
- Settings
- Sensors
You can get to the different screens by simply "swiping" to the left and / or right.
- In the map screen with the map open, swiping down / up takes you to the individual tables (F, I, L, AF etc.) and swiping right (out from the F and I tables) takes you to the Trim tables. By swiping to the left, you get back to the screens of "Map", "Dashboard", "Settings" or Sensors ".
Map Screen:
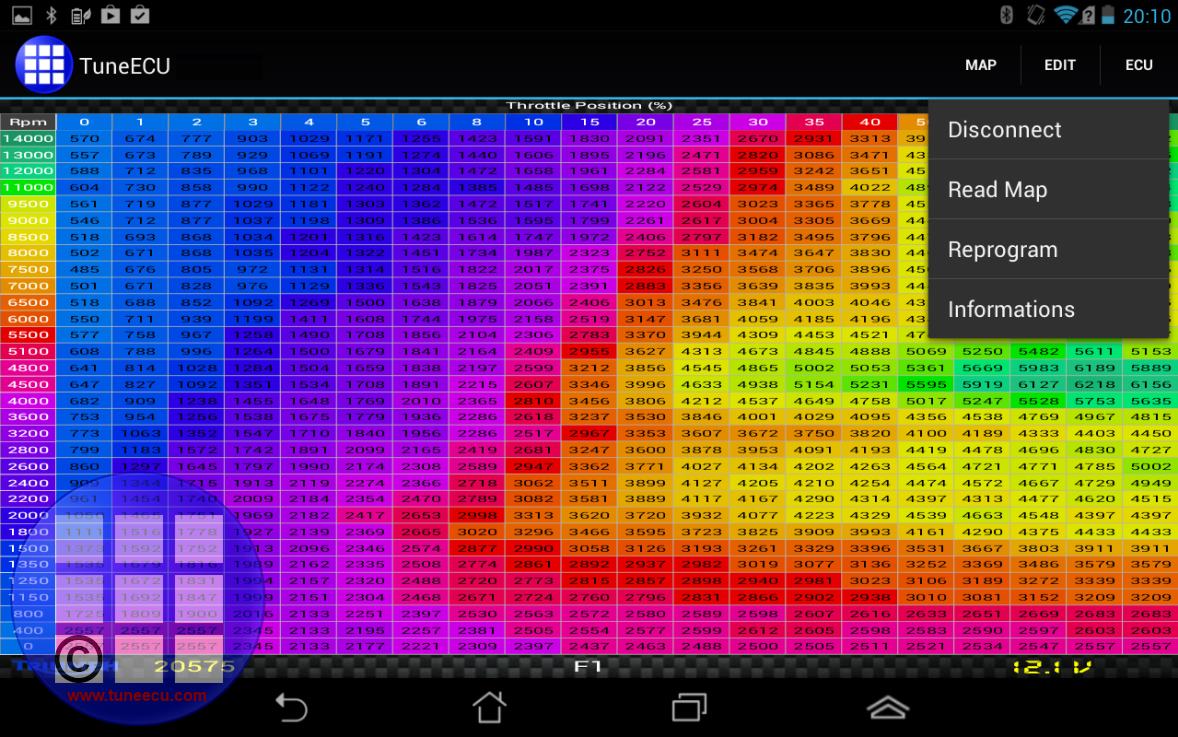
Menu „ECU“
- Connect: Connect to the ECU
- Select: Select the ECU or Bike Typ
- Disconnect : disconnect the ECU.
- Read Map: Read the map from the ECU (only possible via cable connection)
- Reprogram:
Write the map loaded in
TuneECU to the motorcycle ECU.
For many models only via cable, for many newer Triumph models only via Bluetooth.
See "Basics". <<BE CAREFUL!>> - Information: Information about the ECU (VIN, Serial
number, Map number)
- Modify Table: Change of the characteristic maps in the
tables.
In sub menu select "modify table" mark one or several cells, wipe up or down to modify the values.
Procedure:- Open the map under menu Table, hit modify. A flashing red border appears around the table.
- Press on a cell until it turns yellow. Holding your finger down, you can drag over a range of cells
- which turn yellow.
- Lift your finger to stop selecting cells.
- Then move your finger up or down anywhere on the map to increase or decrease the values.
- Save or discard the changes with the green check or red X in the upper right.
- Copy / Paste: Copy or Paste the entire table.
- Graphic Mode : Graphical or Numeric table display.
- F Trim global : Use the F Trim table for all « F » tables
- Commit trims: Apply each Trim table to the F & I
table and reset the F Trim tables.
- Open: open a map from the TuneECU folder or download directly from the web server (OEM-Map's only).
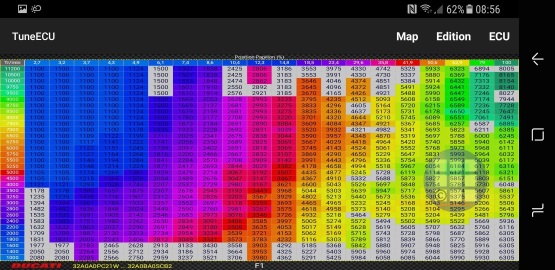
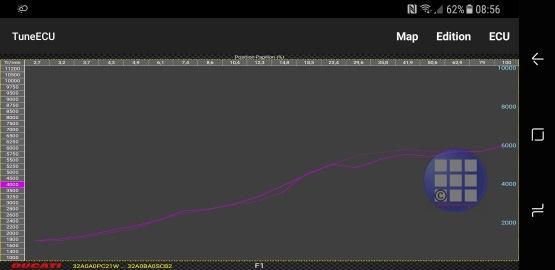
- Comparison maps feature: In cells mode holding your finger
on the screen
to see the difference (colored). In graph mode you can see the difference by rpm or TPS.
- Import table PCIII/V : Import a table PCIII or V in the trim tables.
- Information : Display the “Infos” / Comments from the map
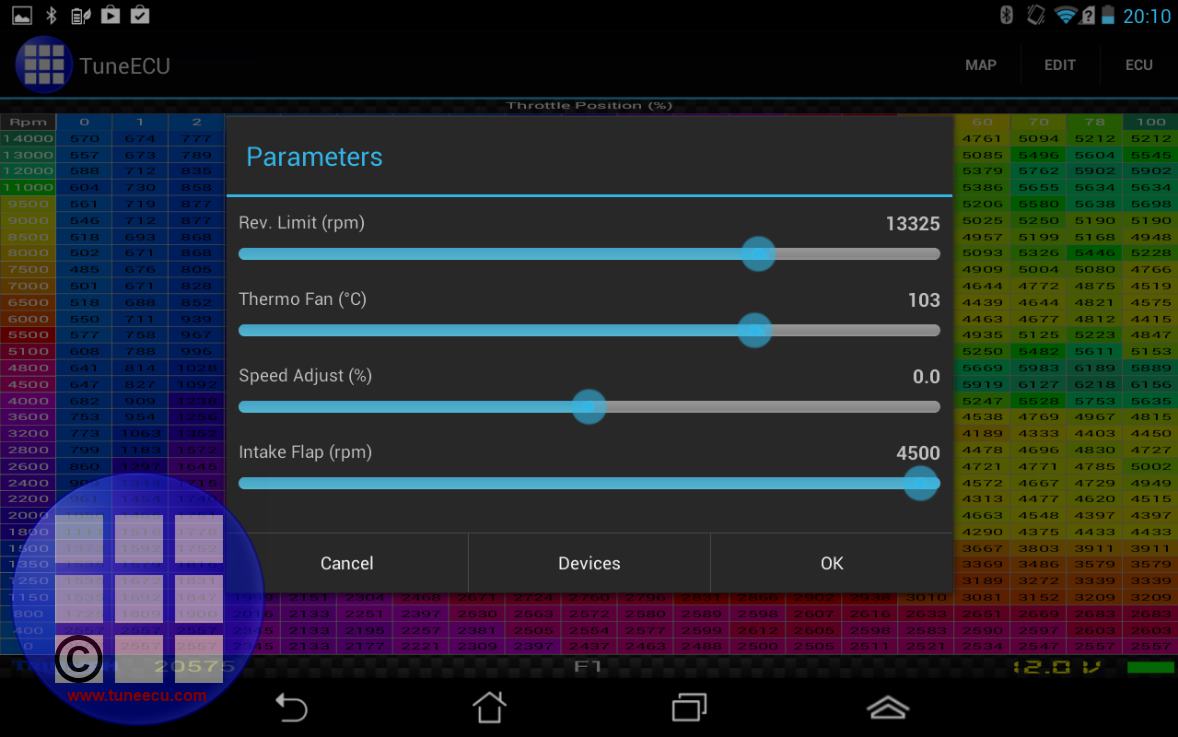
- Parameters:
- Speed setting limitation (1/min)
- Speedometer calibration (not possible on all models)
- Setting the switch-on temp., Thermo Fan (°C),
- Setting the injector flow,
- Setting the target idle A/F etc
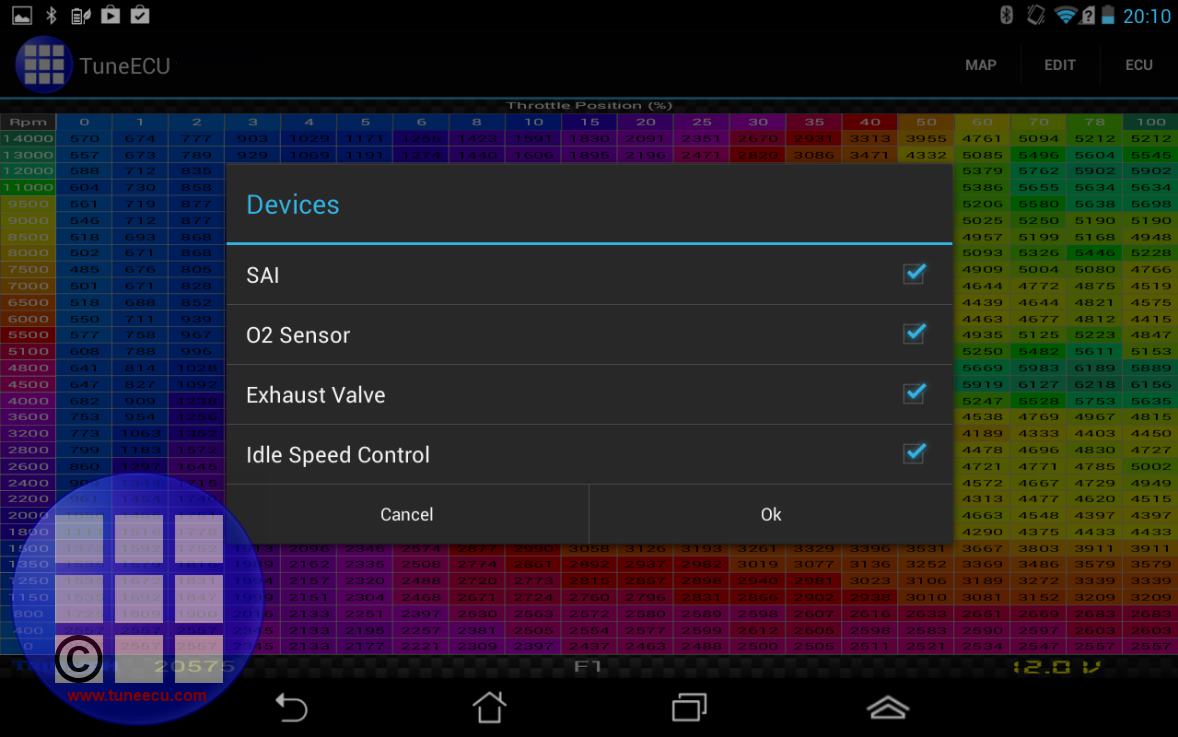
- Devices:
Allow to active or deactivate for the map the following devices:- SAI
- O² probe.
- Immobilizer, e.g. Ducati Monster SR4RS 998
- Traction control
- Deactivate the instrument cluster ---- e.g. for Daytona 675
instrument panel.
Dashboard Screen:
- Connect: Connect to the ECU
- Select: Select the ECU or Bike Typ
- Disconnect : disconnect the ECU.
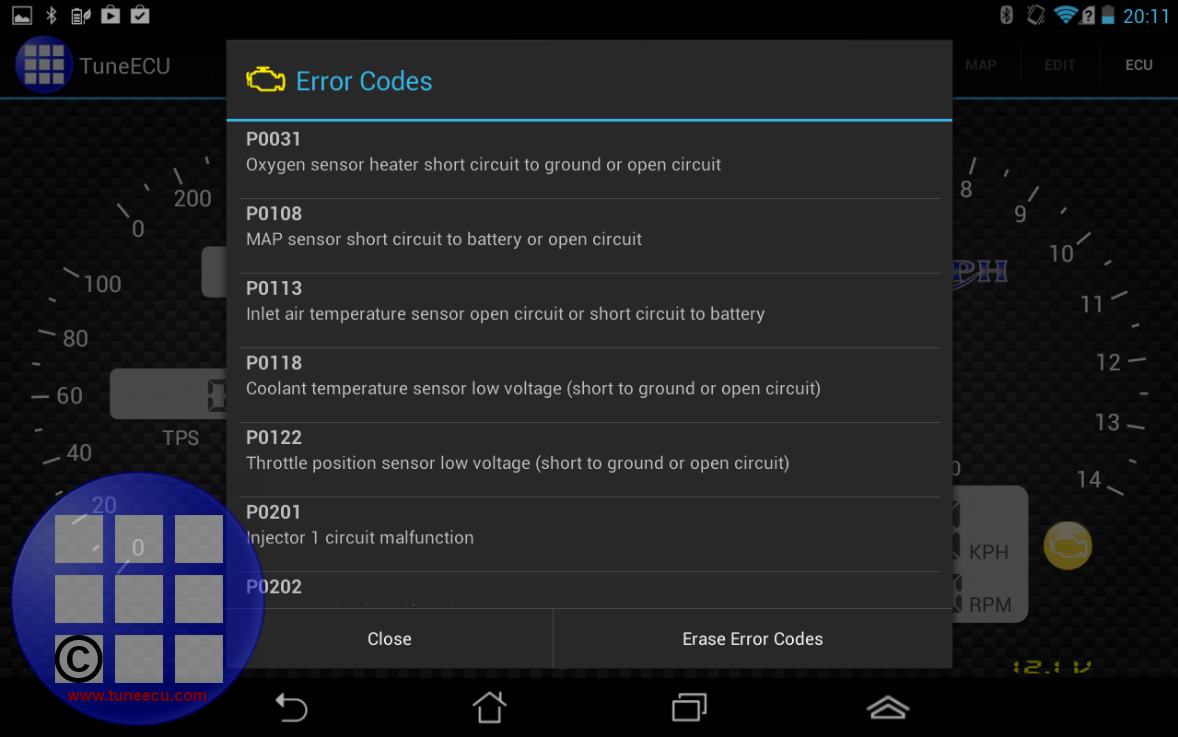
- Error Codes: Display / Erase the error codes stored in the ECU
- Information: Information
about the ECU (VIN, Serial number, Map number)
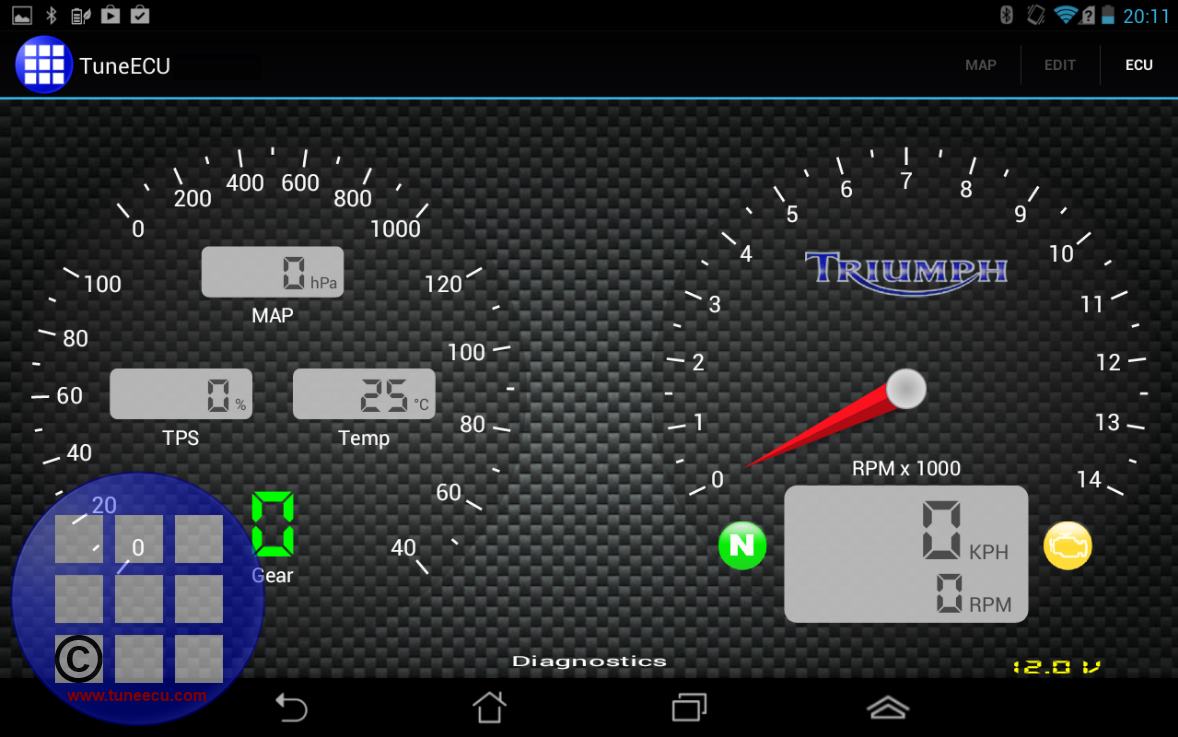
If you press "KM/H> MPH" in the field where speed and rpm are displayed (gray background), for a longer
time, a small window opens in which you can switch between Km/h and MPH and you can choose whether
the GPS should be active or the data stream should be used to determine the speed.
From version v4.8.01 there is a new design and the change from km / h to MPH and vice versa, or the switching on of the GPS is done via the three-point menu
 ---- parameters ---- "speed setting".
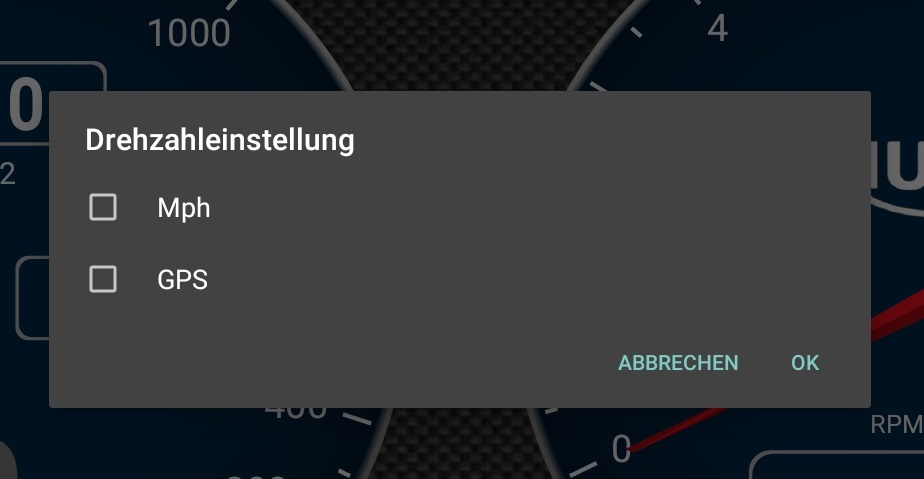
You can also switch from ° C to ° F in the three-point menu using the "Units" option.
In addition, you can use the "Themes" option in this menu to choose between 3 different themes.
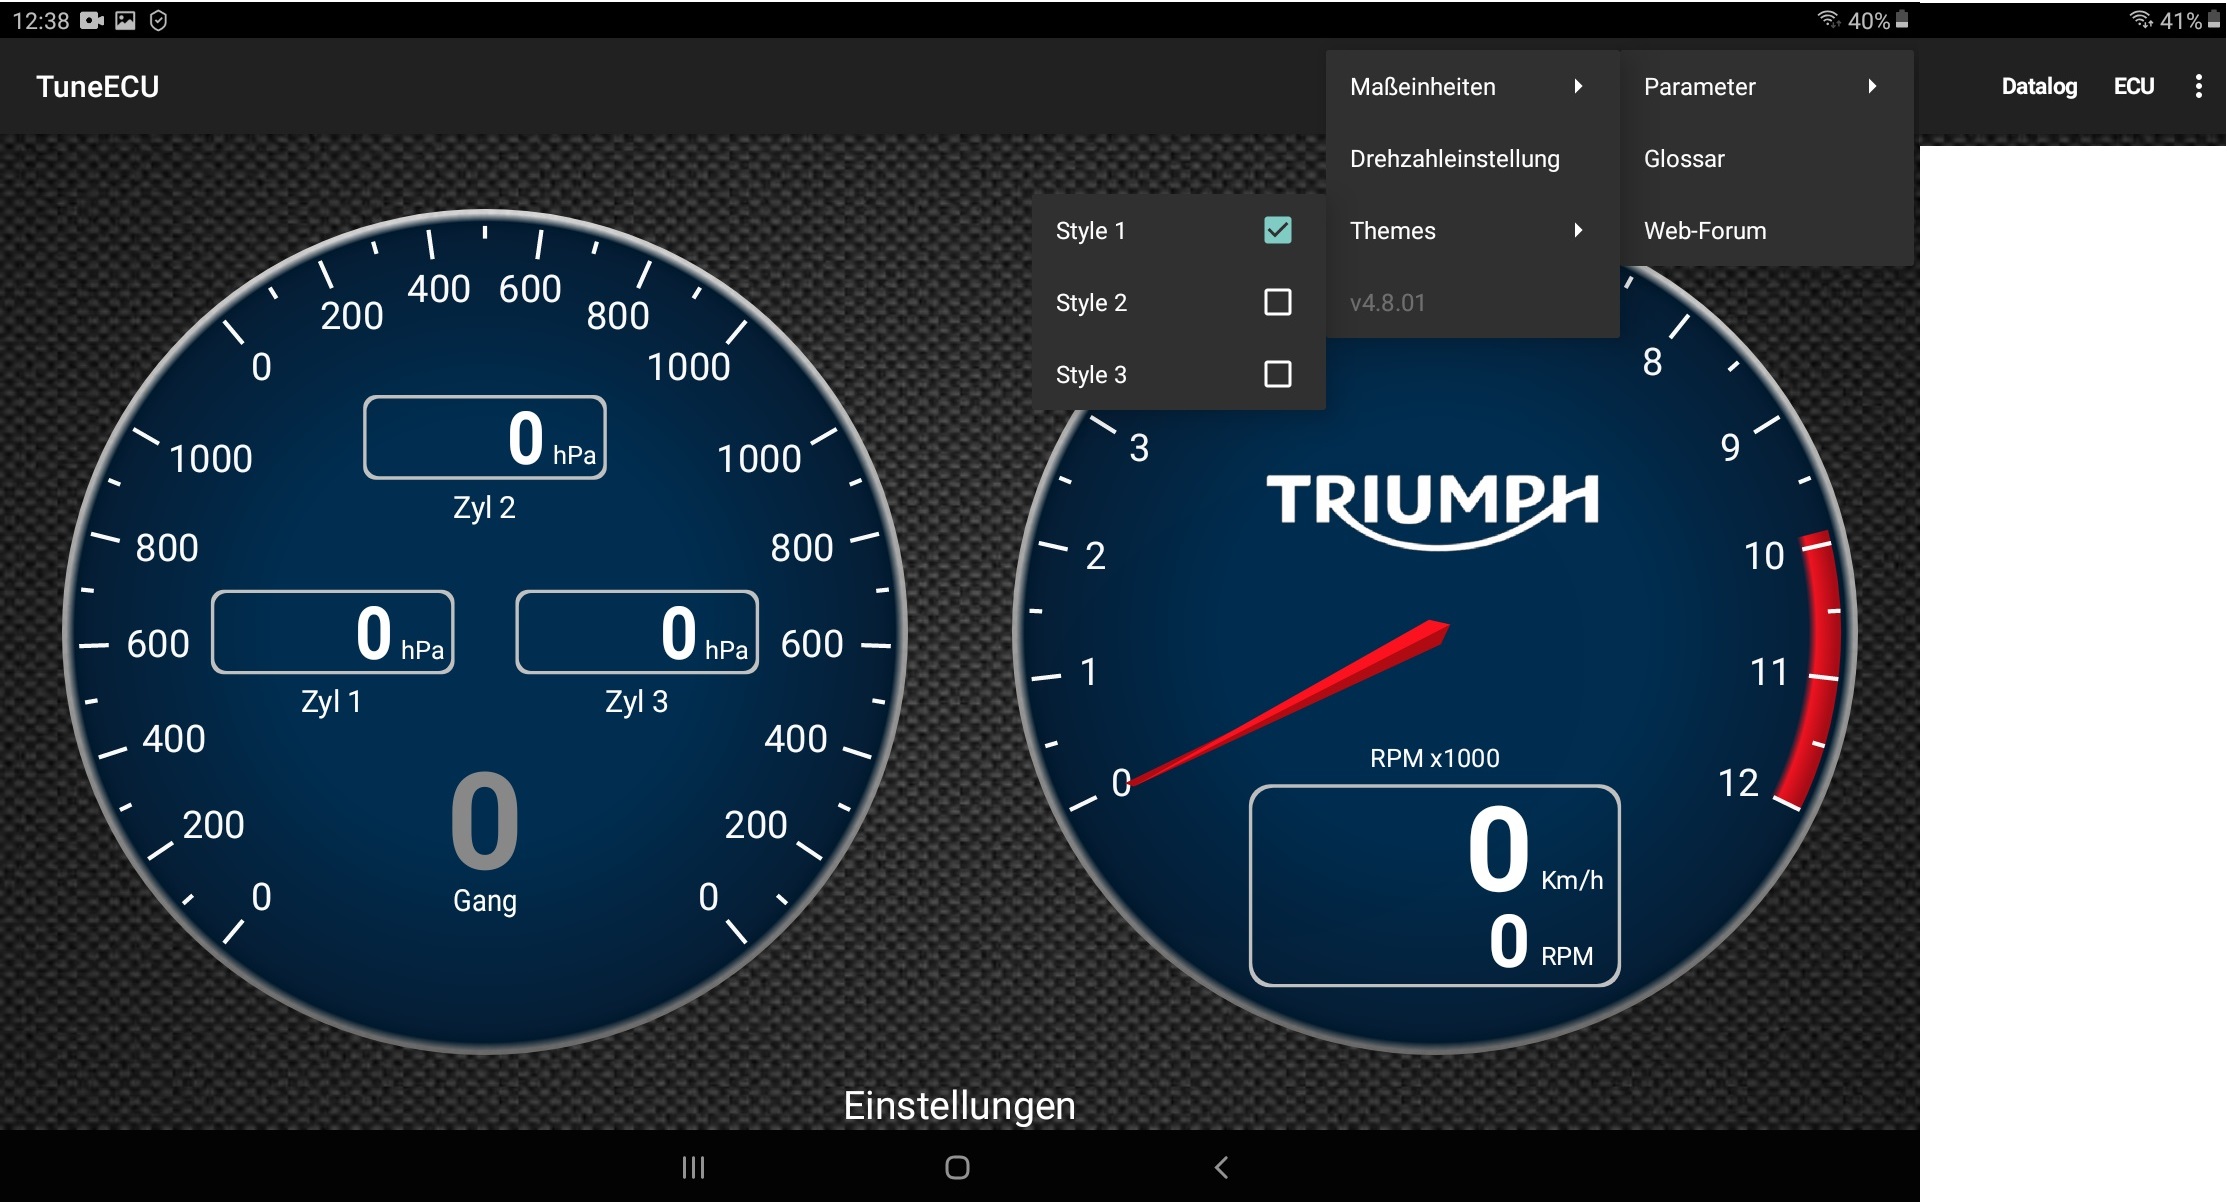
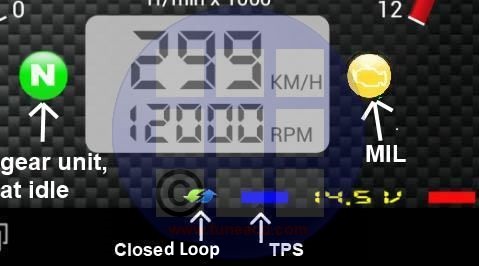
When connected in the Dashboard screen, you have an arrow at the right of the REC button.
Slide the REC button up and it change to TPMS button.Long press on the button to go to the TPMS screen.
Instructions for activating the TPMS, Triumph only.
Adjust Screen:
The left gauge shows the vacuum values for the cylinders to allow the butterfly synchronization only for Keihin ECU's.
.
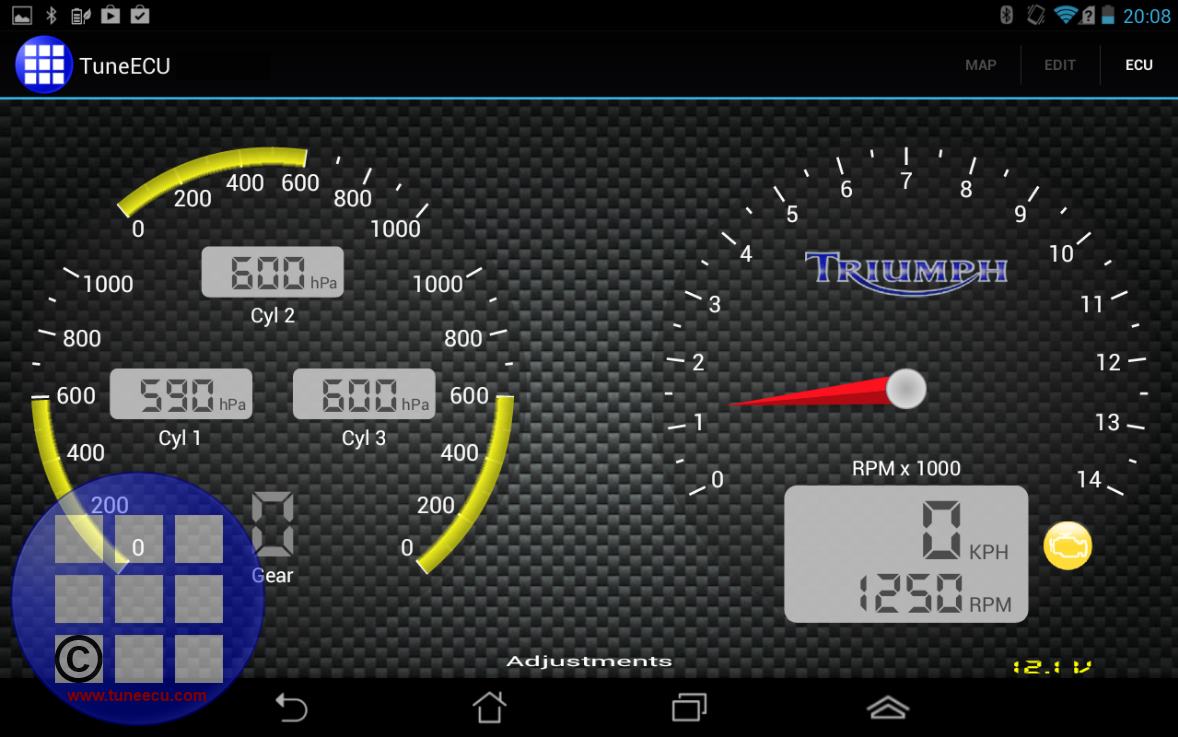
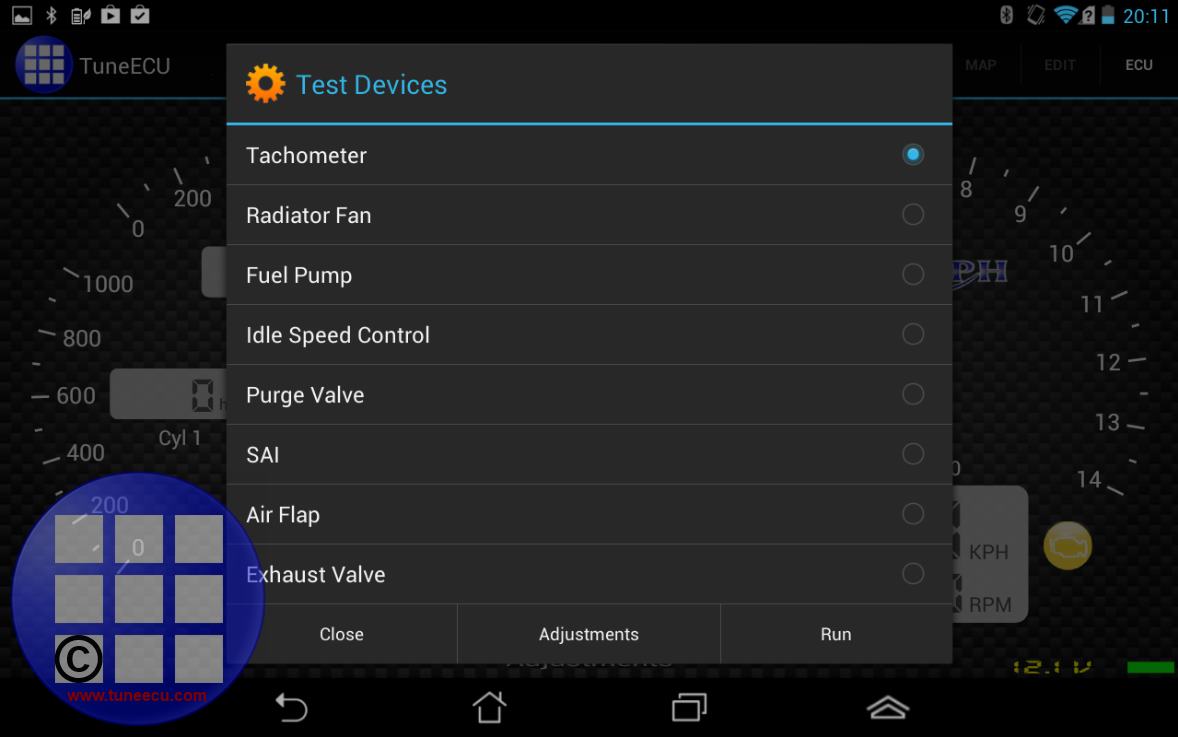
- Connect: Connect to the ECU
- Select: Select the ECU or Bike Typ
- Disconnect : disconnect the ECU.
- Error Codes: Display / Erase the error codes stored in the ECU
- Tests & Adjustments: Test components (fuel pump, radiator fan, etc…)
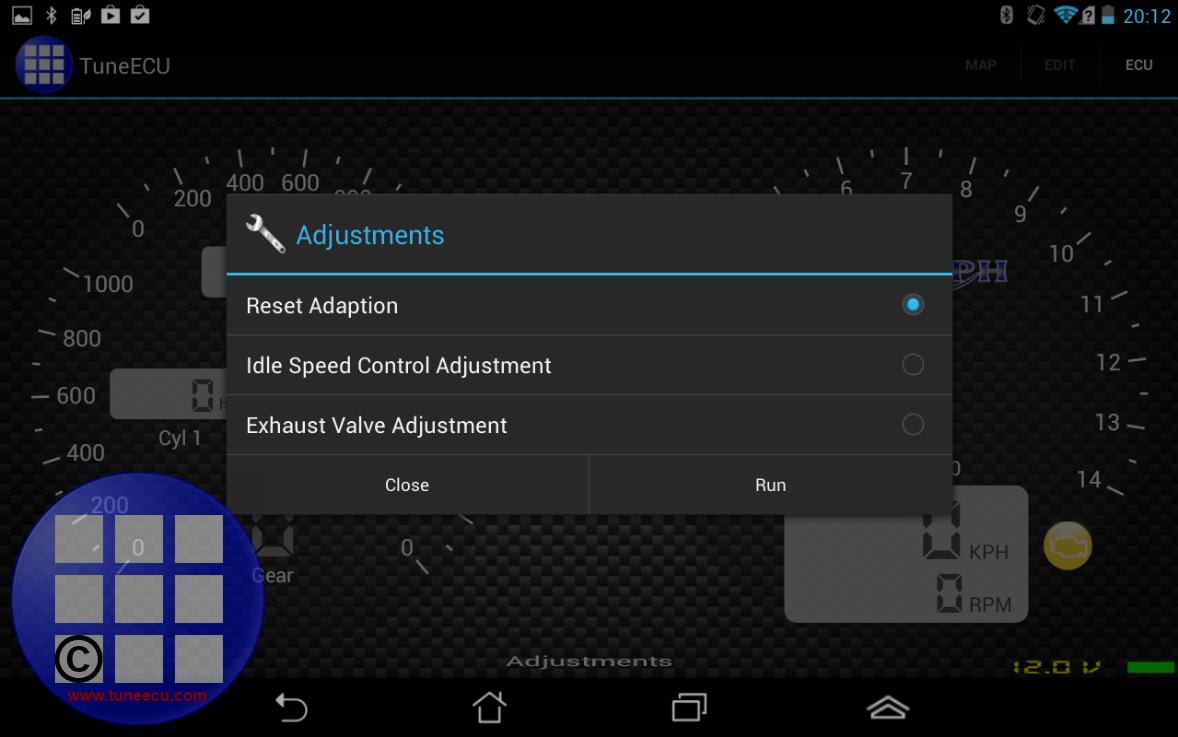
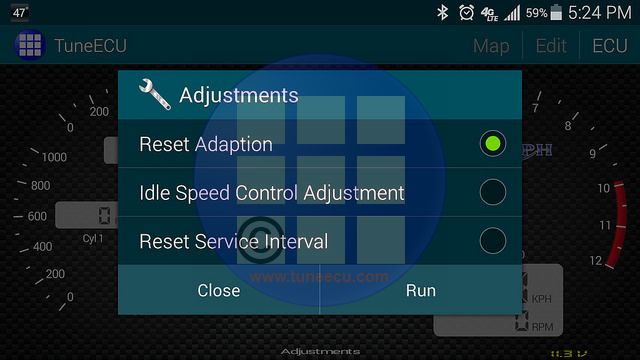
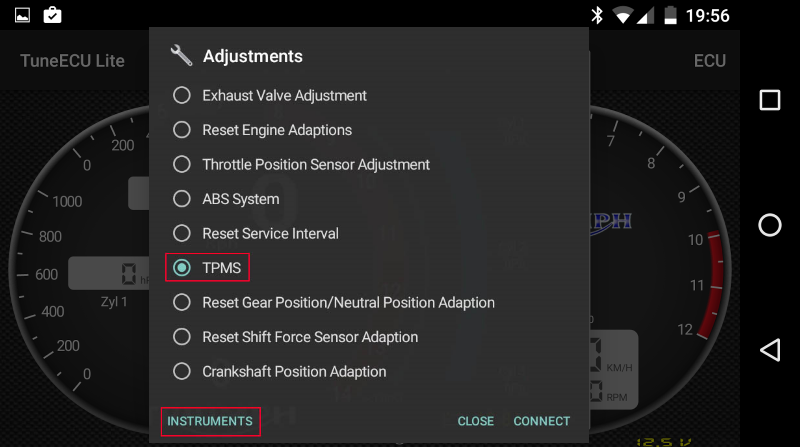
- Adjust :
- CO adjustment (Sagem)
- TPS reset (Sagem & IAW5AM)
- Idle air control valve (IACV) setting (Sagem)
- Long-term mixture adjustment (Sagem)
- Reset adaption (Keihin)
- Trottle Position Sensor Adjustment (Triumph)
- Reset Gear Position / Neutral / Position Adaption (Triumph)
- Reset Shift Force Sensor Adaption (Triumph)
- Crankshaft Position Adaption (Triumph)
- Setting e.g. "Exhaust Valve" (Keihin)
- Setting the idle control ("TPS / ISCV") (Keihin)
- Devices adjustments (Exhaust valve, Idle speed, .)
- Reset Service Interval (Triumph) (exclusively
with Bluetooth)
ATTENTION! The date on the dashboard (bike) must be correct.With TuneECU the reset interval service now might be done on some
Triumph models Euro 5 also:- Thriumph
all models except Tiger 1200 MY 2022+: The Reset Service Interval (when
supported) can be done only with a Bluetooth adapter.
Tiger 1200 MY 2022+: The Reset Service Interval can be done only with a OBDLink adapter.
- Thriumph
all models except Tiger 1200 MY 2022+: The Reset Service Interval (when
supported) can be done only with a Bluetooth adapter.
- Activating TPMS (Triumph only)
- ABS Bleed feature, Triumph only (with
usb cable, for models with K-line protocol only,
for the Ride by Wire models only with bluetooth.) The ABS bleeding doesn't work on the
latest Triumph models (MY 2021 and up)
Sensor Screen:
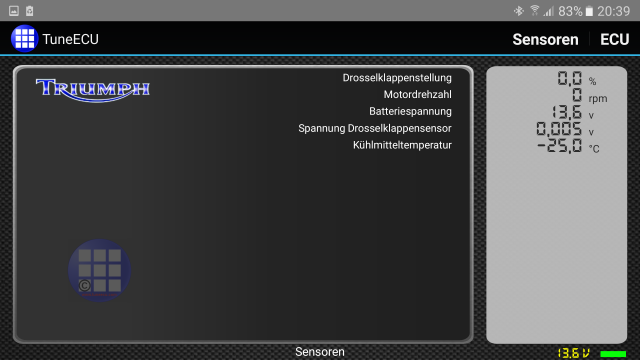
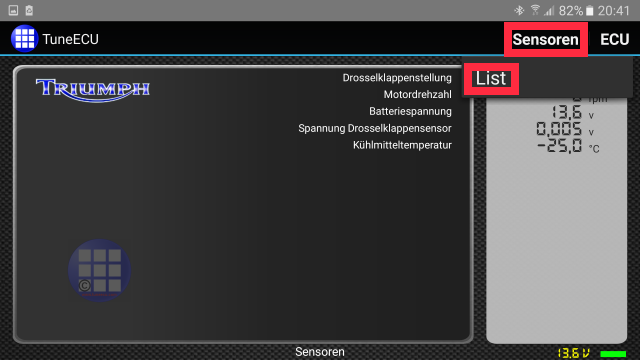
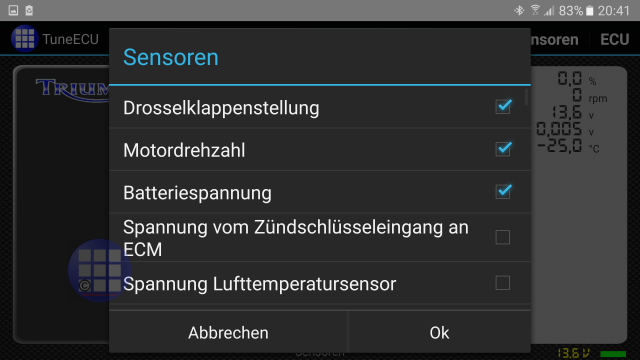
In the Sensors Screen, all sensors in the bike can be checked for their values.
It can be selected via a submenu, the sensors whose values you want.
- Click twice on the "REC" button (or do a long press for Android version 4),
it must turn green and the red dots must appear at right of the values.
- Select your bike and connect. When datas are recording, the "REC" button turn red.
- The recording is stopped by a long press on the "REC" button again.
A Datalog file is saved in .csv format in the "TuneECU/Logs" folder on your Android device.
This file can be played in the Dashboard Screen or opened and viewed in a screen.
Delete a bike
When 5 bikes has
been registered, you have the possibility to delete one (you must be connected
to internet).
Go in the menu
"3 dots/License", click on the number of bikes, then select the bike
you want to delete.
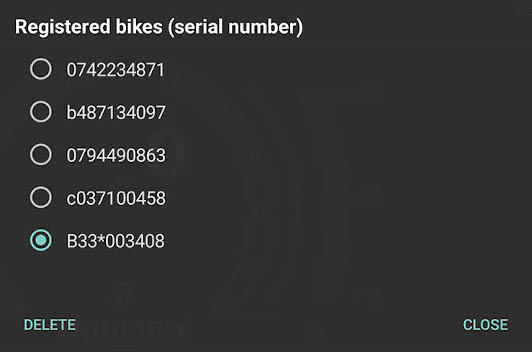
The deleting
confirmation is displayed a few seconds in the bottom of the screen.
Videos
- With the der Android Version on a Speed Triple 1050, model year 2014
- With the Android Version on a Street Triple, model year 2013
- With the Android Version via Bluetooth on a Street Triple, model year 2013 (Service Reset)
- With the Android Version via Bluetooth on a Tiger 800 XCA, model year 2018 (Service Reset)
- With the Android Version via Bluetooth on a Trident 660 (Service Reset)
- How to modify a TuneECU map with the Android Version ( author: Alain )
- Pair the Bluetooth adapter (German)
- Read and save map (German)
- Write map to ECU (German)
- How To Sync / Balance Throttles | Triumph Rocket III | TuneECU | TuneBoy
- How To Adjust TPS | Reset ISCV on Triumph Rocket III with TuneECU
- Tutorial for reprogramming a Triumph Rocket 3 R (Language: French)
- How to unlock your new Triumph Tiger GT Pro for more power
Appropriate equipment:
The OBDLink LX or MX or MX+ Bluetooth adapter
is required for the newer Triumph models, other
adapters do not work. See Bikes List.
Since TuneECU version 5.5.42 from 05/20/2022, the Bluetooth adapter "UniCarScan UCSI-2100" (minimum firmware v2.49) can also be used for a reassignment of the ECU on the newer T-models.
Glossary:
ABS: Anti-lock Braking System
CAN: Controller Area Network
DTC: Diagnostic Trouble Codes
ECU: Engine Control Unit
EPC: Electronic Power Control
EXBV: Exhaust Butterfly Valve
IMU: Inertial Measurement Unit
ISCV: Idle Stepper Control Valve
MAP: Manifold Air Pressure
MIL: Malfunction Indicator Lamp
SAI: Secondary Air Injection
TC: Traction Control
TPMS: Tire Pressure Monitor System
TPS: Throttle Position Sensor
TSA: Triumph Shift Assist
TTC: Triumph Traction Control
VIN: Vehicle Identification Number
Use of the software is at your own risk. Neither the software developer or the website operator will provide any form of guarantee.
!!
Important note !!
No Motobike Manufactor
have had involvement in this product.
The use of a manufactures name and / or model designation to describe
the motorcycles on this site does not imply that the manufacturer
endorses
the use of this application.
All care has been taken in the
creation of this page, however, the author
cannot guarantee the completeness and accuracy of this
information.

